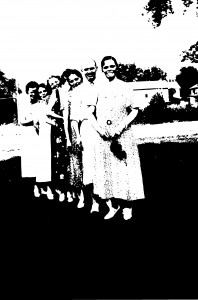
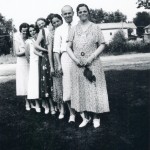
AH! Ha!
There are tips you learn before you try your hand at a task, there are others that jump out at you when you believe you are doing everything just right.
Well tonight’s tip comes from learning the hard way. I am just thankful I only scanned 20 photos and not a much larger number.
I am chugging along, remembering that I have seen that one should save photos in TIFF and at least a 300 DPI resolution if not more for archives. Scanner set for TIFF check, set at 600 DPI check, and set to black and white check! After all the photos I am scanning are black and white. What could go wrong, nothing this should be a breeze. Scanner is working quickly and it’s not taking all night. (that should have been a clue)
Pictures are all now scanned, and I am now cropping the photos. They look good in the thumbnails but when I open them up bigger they sure don’t look right, they are very grainy and and full of shadows! What the heck did I do! I know some of you are already chuckling, silly silly girl. These photos should be very fine, but they aren’t (scratching head)

OH!!! the light goes on! The pictures are indeed black and white, but in black and white photography there are nuances that scanning in black and white does not catch, it literally turns the photos black and white no in between colors. Now that I have figured that out and I am now scanning again, and in the mean time I have written this while re-scanning the photos.

The settings that I am now using are color, TIFF and 600 DPI. I am much happier with these results! Maybe with the next batch of black and white photos I will try gray scale. Never know what I might get it always helps to know how things turn out in other formats, a process that I might be able to use in other aspects of photographic work.
Now to upload the rest of the pictures to Ogilvie Family Photos so that I can share them with my family.
Happy Scanning!